A campfire is often the highlight of any camping trip—the centerpiece around which everybody gathers to relax after an eventful day of activities.
However, sometimes a campfire can be much more than just a way to relax—it can actually be a survival tool. When trying to survive in the wild, there are four things that are absolutely essential: shelter from the elements, water for hydration, fire and food. But what happens if you don’t have all the tools you need to start that fire? This is what we will cover briefly in this article.
In the first part, we will teach you how to build a proper campfire when you have everything you need to do so—matches, etc—and in the second part of the article we will explain a few nonconventional ways to build a fire to ensure your survival.
SKIP AHEAD
How to Start a Campfire: When You Have Everything You Need
When you have everything you need to start a campfire, including wood, matches and/or a lighter of some kind, you might think that starting—and maintaining—your campfire would be a snap. However, there are some people, based on experience, who would openly disagree with that stance. Even when one has all the tools and materials they need to light a campfire, if they don’t do the process correctly, they may find themselves frustrated and—depending on the weather—very cold indeed.
To help you look like a true outdoorsman on your next big camping trip, below we have outlined some of the materials you will need to start and maintain your campfire, and the process for using those materials.
Gathering Your Materials
To build the perfect campfire, you will need to assemble—and have at the ready—several materials and a couple pieces of equipment. These materials include tinder, kindling, firewood and either matches or a lighter.
Tinder
Tinder can be defined as things that catch fire and burn easily. Tinder is what you will use to initially start the fire, before you begin to build it up so it will last. Materials that qualify as tinder include:
- Wadded newspaper. Although any type of wadded paper can serve as tinder, newspaper catches very quickly.
- Wood shavings. Look around your campfire for dried wood shavings. During the prime summer camping months, these shavings should be easy to find. However, if you plan to camp during the colder months, you may want to bring a small bag of wood shavings with you.
- Dried pine needles. Dried pine needles catch rapidly and can be a great base for your fire.
- Cardboard. Like newspaper, cardboard can be a great fire starter. Make sure to cut the cardboard into small strips when using this as your tinder.
- Commercial Fire Starters or sticks. Many companies, including Duraflame and others, manufacture and sell commercial fire starters and fire sticks that work great as tinder.
- Wax. Just as wax starts easily on candles, it can work great as tinder for your campfire.
- Dryer Lint. Dryer lint, which is really nothing more than very condensed pieces of cloth, paper and debris, works fantastically as a fire starter.
Kindling
Kindling is the next step up as you build your campfire. It includes very small pieces of wood—twigs and branches—that measure no more than about ½ inch to ¾ inch in diameter. Once the fire has been ignited, kindling is added to increase the size and intensity of your campfire—the last step before you add the much larger pieces of firewood.
It’s a good idea to assemble plenty of these twigs and branches, even if you don’t have to use it all. Wind and inclement weather mean you may have to use more kindling than usual to get your fire roaring.
Firewood
The heart and soul of any campfire, firewood is the most important material you will require. Firewood for campfires can take many forms. Logs, either whole or split (split seems to work better), are the normal form most firewood takes. This firewood must be dried and aged so that it will easily catch—and stay—on fire. It can vary in size from 1 inch to 5 inches in diameter. If you don’t have access to firewood, cut pieces of 2 x 4 or 4 x 4 lumber is a good substitute, but this will usually burn much more rapidly than—and not as hot as—logs.
Matches or Lighter
Matches or a lighter is what you will use to light the tinder. Long, fireplace-style matches are a great choice here, as you won’t need to have your hands as close to the flame. Another good option are the longer, gas-powered and (usually red in color) BBQ lighters, with a click on flame. Since you never know how the weather will be when you’re in the woods, a waterproof lighter or waterproof matches are a great choice.

- Includes 25 windproof and waterproof matches, 3 strikers and match case that can hold up to 40...
- Matches are easy to light, will burn up to 15 seconds each and will relight after being submerged in...
Last update on 2024-04-17 at 22:02 / Affiliate links / Images from Amazon Product Advertising API
When collecting your tinder, kindling and firewood, make sure you only choose pieces that are already on the ground. There is plenty around most campsites. ‘Live” branches, twigs and logs will not burn as readily as dried wood, and there is no reason to damage the forest if you don’t have to.
Building Your Campfire
The step known as “building your campfire” is the process of arranging everything in the fire pit for the most optimal results. Ideally, this step should be undertaken during the daylight hours when there is still plenty of light. That way, when it starts to get dark you will only need to light the fire and enjoy it.
If there is already a fire pit in your campsite (most do have them), be sure to push the ashes from previous fires to the outer edge or, if the ash is cool, consider shoveling it into a bag for disposal. If your campsite does not have a fire pit you can create one. Simply clear a circle space of bare dirt to about 10 inches in diameter, and dig about a 5 inch hole in the center of the pit. Surround the fire pit with rocks for insulation.
Now you are ready to lay the groundwork for your enjoyable campfire.
There are several styles of campfire building that work well, and all of these start by laying your tinder—the very small stuff—in the center of the pit, about one foot in diameter. Here are just a few suggestions of where to go from here:
- The Cross Fire. Stack your kindling in a criss-cross pattern over the tinder, followed by the firewood. This type of assembly is great for a long-lasting fire.
- The Teepee-Style Fire. With your tinder laid out on the bottom of the pit, build the kindling you’ve collected into a teepee shape on top of it. Next, stack your firewood into the same shape around your kindling. After lighting the tinder, and as the kindling begins to burn, it will then light the firewood, providing you with a campfire that will last several hours (depending on the size of your wood).
- The Lean-to or Tent Fire. The lean-to or tent-style campfire structure begins by sticking a large piece of kindling lengthwise into the ground at about a 30 degree angle—directly over the tinder. Next, stack smaller pieces of kindling around each side of this protruding piece until you have built it into a tent shape. As the fire catches, add larger pieces of kindling, and finally your firewood. This is a great build for cooking.
Most campfire constructions will work well for you if you remember just a couple basic rules. First, the order of ignition is always tinder, kindling, firewood—small to big. Leaving a space between the different levels of your fire is also important, as it allows the oxygen to flow—fires will go out without oxygen
Lighting Your Campfire
Lighting your campfire doesn’t take much expertise. However, you will need to be careful that you don’t accidentally burn yourself or others. To light your campfire, use a long stick match or lighter and ignite the tinder in several places, making sure it has time to catch.
Never use charcoal lighter, gasoline or other flammable substances to ignite your fire. It is unnecessary and very dangerous. Also, never leave your fire unattended, and always keep your extinguishing materials—dirt, a shovel and plenty of water—nearby just in case you need them.
After you have enjoyed your campfire for the night, make sure you completely extinguish it before going off to bed. To do this, begin by breaking up any larger logs to expose burning embers. Use an ample amount of water on the fire, and keep adding water until no smoke is rising. Once extinguished, cover the ashes with dirt.
How to Start a Campfire: When You Don’t Have Everything You Need
The type of campfire described above is often the highlight of any camping trip. It’s the place/event where people roast marshmallows, gather to talk and even tell ghost stories. However, in emergency situations—such as when you become injured or lost when hiking in the mountains or forest—a fire can be much more than that. It can represent the only way you can cook or sterilize water, the only way you can stay warm in the elements, and the only way you can alert other people as to your location. In other words, it can help you survive. In cases such as these, you may not be in possession of matches or a lighter. These can be scary ordeals to say the least, but there are some ways to start that all-important campfire when you lack certain fire-starting materials.
The Friction Hand Drill
When you don’t have matches or a lighter to start your fire, you must rely on other materials and techniques. One such set of techniques are known as the “Friction-Based Fire Starting Methods.” Although starting a fire through friction is probably the most difficult of all the non-match/lighter methods, it is possible, and learning how to do it may one day save your life.
The Friction Hand Drill starts with a (bone-dry) fire board and spindle. As you might expect, the spindle is the stick you will spin as you attempt to create friction between it and the fireboard below. If enough friction is created, the ember that results can be used to start a fire. Wood that makes for a good spindle and fireboard set includes aspen, willow and cottonwood, among others.
You have probably seen people on survivalist shows attempting to use the hand drill method to start a fire—one of the most primitive methods known to man. In this technique, you will need to follow the steps below:
- Build a tinder nest. The tinder nest is what we hope will catch fire from the ember we create through friction. It should consist of (very) small wood shavings—like shavings from a matchstick.
- Notch the Fireboard. Notch the fireboard with a V-shape, placing a small depression next to the notch.
- Place Bark beneath the notch. Directly under the notch, place a piece of bark, which will be used to catch the ember you’ll create through the friction.
- Spin. Using your spindle, begin spinning as fast as you can, trying to create as much friction as you can. You will need to continue this until you see an ember start to form near the notch of your fireboard.
Once the ember appears on the fireboard, gently tap it to transfer the ember to the bark underneath. Then, transfer the bark to the tinder nest, and gently blow on it until the flame has begun.
Flint and Steel
A good Flint and Steel set is a must for any survivalist bug out bag. Known as one of the oldest and most reliable ways to start a fire without a match, it can help you create a fire in even the harshest of conditions. In addition to the flint and steel, it’s a good idea to always carry a piece of char cloth in your backpack. Char cloth is a piece of cloth that has essentially been turned into charcoal—and serves as a great way to initially catch the ember created when the flint and steel are used in combination.
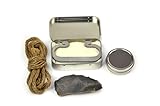
- 1x English Flint Piece
- 1x High-Carbon Steel Striker
Last update on 2024-04-18 at 00:43 / Affiliate links / Images from Amazon Product Advertising API
If you don’t have a flint and steel set, a good piece of quartzite can substitute for the flint, while your pocket knife can substitute for the steel. Additionally, a piece of fungus or bark can be used instead of a char cloth.
To use this method, grasp the char cloth between your thumb and the flint. Then, holding the back of your steel striker, strike the flint several times until you start to see sparks. Ideally, one of those sparks will catch the char cloth, which can then be transferred to the same type of tinder nest described in the method above.
Starting a Fire with Lenses
Growing up, most little boys—and girls—learned the concept of starting a fire with lenses. We would take our tiny magnifying glass out into the warm summer sun, and begin scorching weeds and melting toys, all the while learning an important survival skill for starting a fire (although we didn’t know it then).
To start a fire using lenses, all you will need is some type of lens through which to magnify and pinpoint the heat of the sun. A magnifying glass, eyeglass lenses, binocular lenses and other types can all be used for this purpose.
- Build a Tinder Nest. As we have done with most of our other fire burning methods, the first step to the lens method is building a tinder nest—a nest made with tiny burnable wood shavings or dried leaves.
- Angle the Lens. Holding the lens about two inches above the tinder nest, angle your lens so it creates the tiniest beam of light possible. The smaller the beam, the more intensity of the heat.
- Start and Add to the Fire. The heat from the intense beam of light the sun produces as it is filtered through the lens will in no time catch the tinder on fire. Once it does, begin adding somewhat larger pieces of tinder, followed by kindling and then firewood. A good rule of thumb is to double the size of the wood you use each time you go to the next step—1/8 inch, followed by pieces ¼ inch in diameter, etc.
Of course, these are just a few of the many, many ways to start a campfire, but you get the idea. Whether you’re looking to start a happy family campfire or you’re stranded in the woods fighting for your survival, the above-described techniques are all great ways to ensure a great campfire for cooking, purifying water, and, of course, roasting those marshmallows on your way to making tasty S’mores.
More resources:
- Starting a fire in windy conditions, Survivalist Boards
- Home Made (DIY) fire starters, Geocaching Forums
image credit: kjekol/Deposit Photos
